
Today we made some 3-D pumpkins.....they take a little time to prepare before the kids actually get to be involved.....I don't like to do a lot of crafts like this just because 1. I don't have a lot of free-time and 2. I want the project to be the kids' creation, not mine.
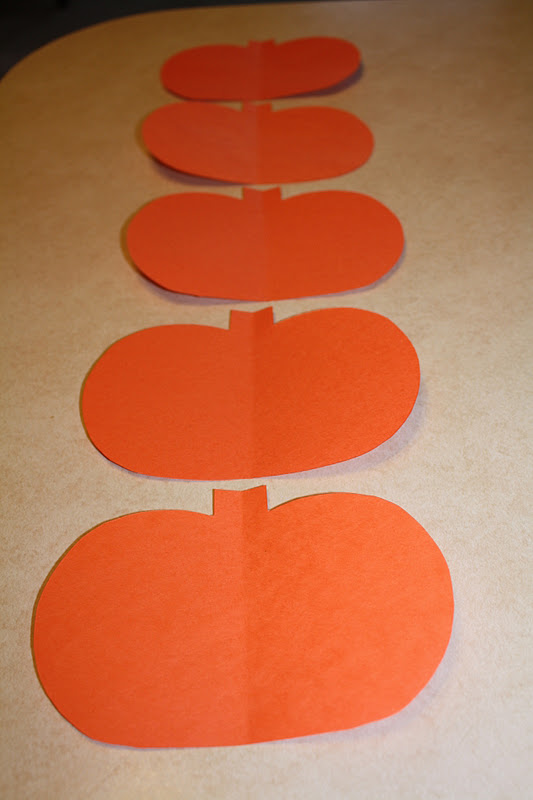
For each child you need to cut-out 5 pumpkins (you could do more) that are symmetrical. I made a pumpkin template to use. If you fold your paper in half, trace half your pumpkin template on the fold and then cut out.....when you unfold it you should have symmetrical little pumpkins.


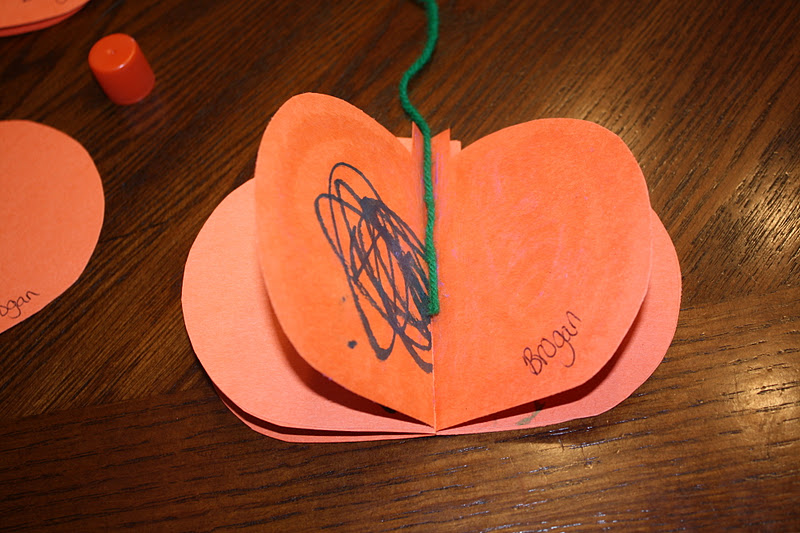
Then let them decorate however they want.....draw faces, color, glitter, paint, etc. This would also be very cute with decorative paper.....would be fun for an older child to cut-out themselves and make (may have to do this with Reese after school).


When they are all done, it's time to put them together. If you made your pumpkins like we did, your pumpkins should be folded in half already. If not, go ahead and fold them all in half. Start by glueing half of one pumpkin to half of the next pumpkin (I had the children do the glueing.....they LOVE to glue!) Continue attaching one half of each pumpkin to the next. Before attaching your final pumpkin, place a length of string or yarn in the center. This is how you'll hang your pumpkin when you're finished. Now glue that last pumpkin to the first one. Make sure all the surfaces are attached really well and that the string is glued securely in the center and you're done.
Aren't they cute!


Tracy
No comments:
Post a Comment